Understanding Drone Photography Basics
Drone photography has revolutionized the way we capture images from above, offering unique perspectives that were once only reserved for high-flying helicopters or planes. Whether you’re a hobbyist looking to elevate your photography skills or a professional eager to add drone photography to your portfolio, understanding the fundamentals is essential. From how to take professional drone photos to mastering the intricacies of aerial composition, this guide provides a comprehensive overview of what you need to know.
What Makes Drone Photography Unique?
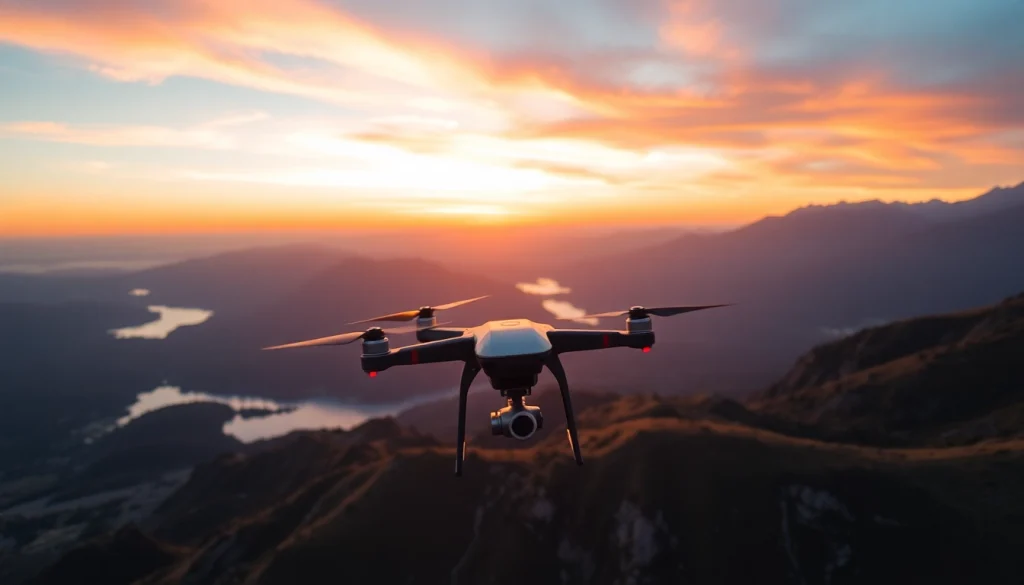
The key distinction of drone photography lies in its ability to provide an aerial perspective, offering a bird’s-eye view of landscapes, events, and urban settings. This unique angle enables photographers to capture intricate details and vast spaces in ways that ground-based photography cannot. The dynamic mobility of drones allows for creative shot compositions and vantage points that engage audiences and tell compelling visual stories.
Essential Gear for Professional Drone Photos
Investing in the right gear is crucial for achieving stunning drone photos. At a minimum, you’ll need:
- A Drone: Choose a model that suits your needs—consider factors like camera quality, flight time, and ease of use. Popular options include the DJI Mavic series and the Phantom series.
- Camera Filters: Polarizing and ND filters enhance image quality by reducing glare and controlling light exposure.
- Spare Batteries: Extended flight sessions require additional battery power, allowing you to maximize your shooting opportunities.
- Editing Software: Tools like Adobe Lightroom or Photoshop will help in post-processing your images for a professional finish.
Basic Photography Principles for Drones
Understanding basic photography principles remains essential in drone photography. Consider the rule of thirds for composition, leading lines to guide the viewer’s eye, and the importance of framing your subject. Additionally, mastering exposure, focus, and depth of field through your drone’s camera settings will enhance the professionalism of your images.
Camera Settings and Techniques
How to Adjust Camera Settings for Drones
Setting your camera correctly is critical in achieving high-quality drone photos. Here are some key settings to adjust:
- ISO: Keep your ISO as low as possible to minimize noise in your images. For bright days, aim for ISO 100-200.
- Shutter Speed: A faster shutter speed is preferable to avoid motion blur, especially in windy conditions. As a rule of thumb, use a shutter speed at least double your focal length.
- Aperture: A higher f-stop (like f/5.6 to f/8) helps achieve greater depth of field, keeping more of the scene in focus.
Best Techniques for Capturing Sharp Images
Achieving sharp images requires more than just the right settings. Here are some techniques to ensure clarity in your photos:
- Use a Gimbal: A gimbal helps stabilize the camera and curbs unwanted movements during flight, resulting in sharper images.
- Practice Flying Skills: Smooth flying techniques can prevent vibrations and shakes that might lead to blurry images.
- Focus Manually: Autofocus can be unreliable in some scenarios; set your focus manually to ensure it’s sharp on your subject.
Using Light to Enhance Drone Photography
Light plays a pivotal role in photography. In drone photography, the best times to shoot are during the golden hours—shortly after sunrise and before sunset. This type of lighting adds warmth, depth, and texture to images. Additionally, knowing how to utilize shadows effectively can add drama to your shots. Look for contrasts in landscapes where elements of light and shadow play to create captivating compositions.
Choosing the Best Locations and Environments
Factors to Consider for Scenic Drone Shots
When selecting locations for drone photography, consider aspects such as:
- Legal Restrictions: Ensure that flying is permitted in your chosen area and check for any airspace restrictions with local regulations.
- Weather Conditions: Clear skies with minimal wind are best for stable flights and clear images.
- Safety: Always be aware of your surroundings and avoid crowded areas or obstacles that could interfere with your flight.
Finding Unique Perspectives and Angles
To stand out in the world of drone photography, experiment with different angles and perspectives. A few techniques include:
- High and Low Angles: Play with your drone’s altitude; shooting from different heights can dramatically alter the impact of your images.
- Oblique Shots: Tilt your drone slightly during a shot to capture dynamic perspectives that convey motion or create an immersive feeling.
- 360-Degree Pans: Rotating the drone while capturing images can allow for a diverse range of compositions in a single flight.
Leveraging Natural Elements in Photography
Incorporating natural elements into your compositions can enhance the storytelling aspect of your drone photos. Look to include features such as rivers, mountains, or forests in your frame. Additionally, seasonal changes can provide unique visual interest; for instance, capturing a vibrant autumn landscape or a stark winter scene can create seasonal context that resonates with viewers.
Post-Processing Tips for Drone Images
Basic Editing Techniques for Aerial Photography
Post-processing is where you bring your images to life. Start with basic edits such as cropping for composition, adjusting exposure, and straightening images. Be mindful of the overall structure of the photograph and maintain its essence while enhancing visual appeal.
Color Correction and Enhancement Strategies
Color correction is crucial in achieving a polished final image. Pay attention to white balance to eliminate any unwanted color casts. Use selective adjustments to enhance certain areas of your photo—boosting saturation in the sky or adding clarity to the foreground can bring more vibrancy and depth to your work.
Creating a Cohesive Look for Your Drone Portfolio
A cohesive look is essential for your portfolio. Selecting a consistent editing style will help your images resonate better as a collection. Consider developing a specific color palette or tone that represents your brand as a drone photographer. Regularly refining your editing process will ensure an evolving yet consistent aesthetic.
Showcasing and Selling Your Drone Photography
Building a Professional Portfolio for Drone Photos
Your portfolio is your calling card as a drone photographer. Focus on variety—include a mix of landscapes, events, architecture, and any other specialties you pursue. Aim for high-resolution images and organize them in a way that flows logically. Displaying your best work first and interspersing different styles can captivate and retain viewer interest.
Effective Marketing Strategies for Drone Photography
Marketing your drone photography can be challenging, yet several strategies can enhance your visibility:
- Social Media: Platforms like Instagram and Facebook are ideal for showcasing your work. Engaging with communities related to photography can lead to new opportunities.
- Networking: Attend local photography meetups and workshops, or join online forums to connect with other professionals and potential clients.
- SEO for Your Portfolio: Optimize your website using relevant keywords, image alt texts, and descriptions to increase your site’s visibility on search engines.
How to Approach Clients and Sell Your Work
Whether you’re targeting individual clients or businesses, your approach should be professional. Prepare a pitch that highlights your expertise in drone photography and offers examples of your work. Additionally, consider creating packages that cater to specific audiences, such as real estate agents or event planners. Tailor your pitches, emphasizing how your services will enhance their own offerings.